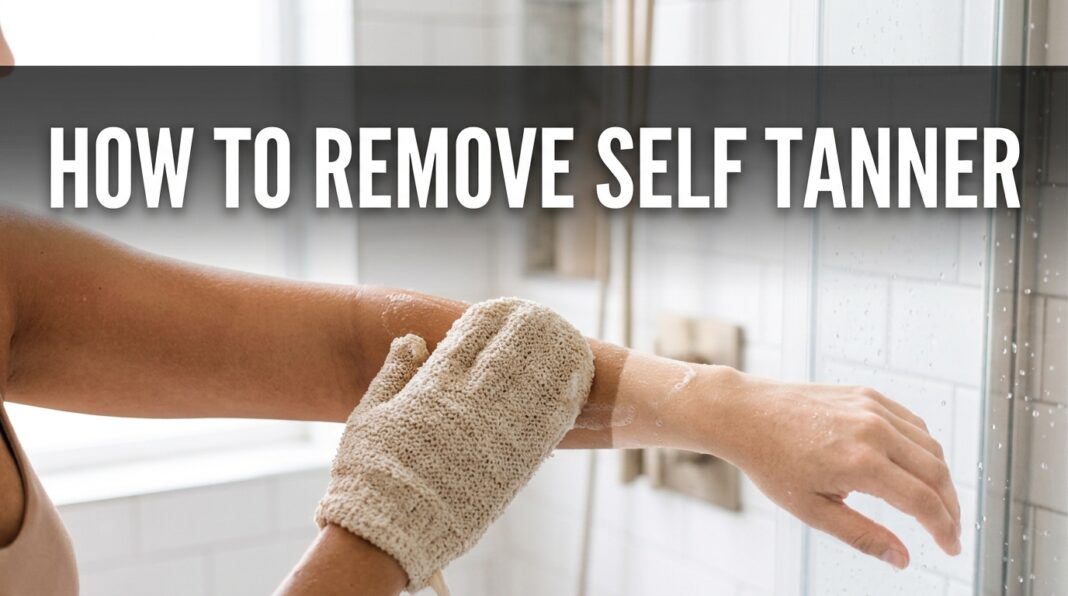
You checked the mirror this morning expecting a subtle bronze glow. Instead, you got tiger stripes on your ankles, orange palms, and a weird patch behind your knee that looks nothing like the rest of you. If that’s why you’re here, take a breath. Knowing how to remove self tanner isn’t complicated, and you almost certainly already have what you need sitting in your bathroom or kitchen cabinet right now.
This isn’t a rare problem. Sunless tanning products are applied by hand, brush, or mitt, and even careful application leaves behind uneven spots because skin doesn’t absorb color at the same rate everywhere. Elbows, knuckles, and ankles are drier and grab more pigment, while smoother areas fade faster. The fix isn’t a special serum. It’s exfoliation, patience, and picking the right method for the part of your body you’re trying to correct.
Below is a practical walkthrough covering what actually works, what to avoid, and how to keep this from happening again next time.
Why Self-Tanner Fades Unevenly in the First Place
Self-tanner doesn’t actually “tan” your skin the way the sun does. The active ingredient in almost every sunless tanning product is dihydroxyacetone, usually shortened to DHA, a simple sugar that reacts with amino acids in the outermost layer of your skin, the stratum corneum. That reaction is what produces the brown-toned color, and it only affects dead skin cells sitting on the surface.
That detail matters because it explains both why bad tans happen and why they’re fixable. Since the color sits on dead skin cells, it sheds naturally as those cells turn over, usually within five to ten days. It also means any product or method that speeds up the shedding of those surface cells will fade or remove the color faster.
DHA is regulated as a color additive for external cosmetic use, and its use is restricted to surface application rather than areas with mucous membranes. That’s a big part of why spray tan booths ask you to wear nose plugs and eye protection, and why you shouldn’t apply self-tanner right before swimming or a heavy sweat session.
Two things make removal more predictable once you understand them. First, thicker skin absorbs more DHA and holds onto it longer, which is exactly why elbows, knees, knuckles, and heels always seem to darken more than the rest of the body. Second, skin cell turnover isn’t perfectly uniform across your body or from person to person, so two people using the identical product can end up with slightly different fade timelines. Age, hydration levels, and how often you exfoliate day to day all play a role in how quickly that surface layer sheds naturally.
This is also why “removing” self-tanner is really just a controlled version of what your skin does on its own every week or two anyway. You’re not stripping a chemical out of your bloodstream or undoing something deep in the skin. You’re simply speeding along a natural shedding cycle in the areas where it happened unevenly.
What You’ll Need Before You Start
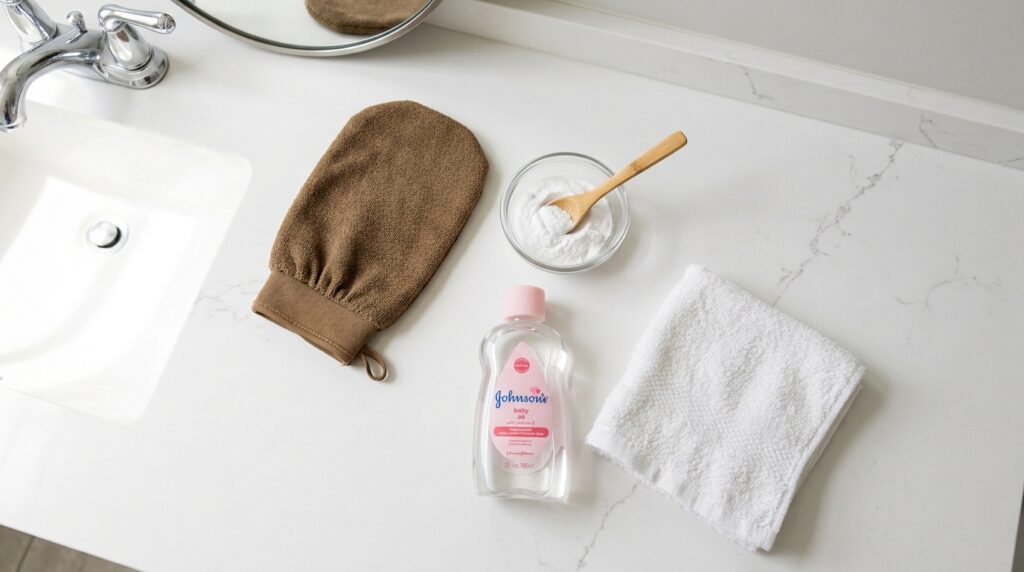
You don’t need a shopping trip for this. Most self tanner removal methods rely on things already in your home. Gather a few of these before you hop in the shower:
- A gentle body scrub or exfoliating mitt
- Baking soda
- A washcloth or loofah
- Baby oil or coconut oil
- Warm (not scalding) water
- A moisturizing body lotion for afterward
Skip anything abrasive enough to actually hurt, like a stiff wire brush or straight-up sandpaper mitts left on too long. The goal is to lift dead skin cells, not to injure the skin underneath them.
Does the Type of Self-Tanner You Used Matter?
Not every sunless tanning product behaves the same way once it’s on your skin, and knowing which type you applied can help you set realistic expectations for removal.
Lotions and creams tend to sit closer to the surface and are usually the easiest to fade with basic exfoliation, since the formula is thinner and doesn’t build up as much layered pigment.
Mousses and foams dry quickly and often deliver a more concentrated, faster-developing color. Because they develop so fast, mistakes in application show up more visibly, but the actual removal process is largely the same as with lotions.
Gradual tanning moisturizers build color slowly over several days of repeated use, which means there’s usually less to remove at any one time, but the color can be trickier to fully strip away since it’s been reapplied in layers.
Professional spray tans applied in a salon booth often use a slightly different DHA concentration and may include added bronzers for an immediate visible tint on top of the developing DHA reaction. The bronzer layer typically washes off in your first shower, while the deeper DHA-based color follows the same natural fading timeline as at-home products.
Whatever formula caused your current situation, the removal methods below apply across the board. The main difference is patience. Gradual tanners and mousses may need a couple of extra sessions compared to a single lightweight lotion application.
How to Remove Self Tanner: Methods That Actually Work
There isn’t one single best method for every situation. A streak on your ankle needs a different approach than an all-over tan you regret entirely. Here are the methods dermatology and beauty writers consistently point to, ranked roughly from gentlest to most intensive.
1. Warm Bath Soak Followed by Gentle Exfoliation
Soaking softens the outer layer of skin and loosens dead cells, which makes them easier to buff away. Fill the tub with warm water and soak for 15 to 20 minutes, then use a washcloth or exfoliating mitt in small circular motions over the tanned areas. This is the gentlest full-body option and the one to try first if your skin is sensitive or you’re dealing with a large area.
2. Baking Soda Paste
Mix baking soda with a small amount of water until it forms a thick paste, then apply it to damp skin and rub gently in circular motions before rinsing. Baking soda is mildly abrasive and slightly alkaline, which helps break down the surface stain without being as harsh as some acid-based methods. It’s one of the most commonly recommended household fixes for stubborn patches.
3. Oil-Based Removal
Oil breaks down the tanning product while also moisturizing skin at the same time, which makes it a good option if your skin tends toward dryness. Massage baby oil, coconut oil, or even olive oil onto the tanned area, let it sit for 10 to 15 minutes, then rinse off in a warm shower. You can follow up with a soft washcloth for extra lift.
4. Lemon Juice for Small, Stubborn Spots
Lemon juice is a natural acid, and that mild acidity works as an exfoliant on small, targeted areas like fingers, knuckles, or feet. Dab it on with a cotton ball, let it sit briefly, then rinse thoroughly. Because it’s acidic, it isn’t the right pick for sensitive skin, broken skin, or large surface areas, and you’ll want to avoid direct sun exposure on treated spots afterward.
5. Whitening Toothpaste on Small Areas
Whitening toothpaste contains mild abrasives, sometimes including baking soda, that can lighten stubborn color on cuticles, knuckles, and between fingers. Dab a small amount on, leave it for a few minutes, then rinse with warm water. This is a targeted fix, not something you should spread across your whole body, and it can be drying, so follow with lotion.
6. Dish Soap for Tough, Callused Areas
Palms, heels, and other calloused spots absorb more color and hold onto it stubbornly. A dish soap that cuts grease effectively can also help break down the tanning residue on these thicker patches of skin. Pair it with a pumice stone for extra lift, but follow up with a rich moisturizer afterward since dish soap is drying by design.
7. Store-Bought Self-Tanner Removers
If none of the above feel appealing, there are dedicated tan-removal products sold specifically for this purpose, usually formulated with gentle acids or enzymatic exfoliants. These can be a convenient option if you want something purpose-built rather than improvised, particularly before a big event when you need reliably even results.
Removing Self-Tanner From Tricky Areas
Some parts of the body hold onto self-tanner longer or show streaks more visibly. Here’s how to handle the trouble spots specifically.
Hands and Fingers
Hands are washed constantly, yet the color often clings around nails, cuticles, and knuckle creases. A soft nail brush dipped in a little dish soap or lemon juice can target these creases without over-scrubbing the rest of your hand.
Feet and Ankles
Heels and ankles are typically dry, which means they absorb more DHA and take longer to fade. A pumice stone combined with an oil-based scrub tends to work best here, since it addresses both the thickness of the skin and the concentration of color.
Face
Facial skin is thinner and more sensitive than skin on the body, so skip harsh scrubs, lemon juice, and toothpaste entirely. A gentle exfoliating cleanser or a soft washcloth with warm water is usually enough, and a light chemical exfoliant with a low percentage of glycolic or lactic acid can help if the tan is stubborn.
Mistakes That Make Self-Tanner Harder to Remove
A few common habits actually lock color in rather than helping it fade, so it’s worth knowing what not to do.
- Scrubbing too aggressively. Hard scrubbing can irritate skin and cause redness that looks worse than the original streaks.
- Using hot water instead of warm. Very hot water can dry out and inflame skin without meaningfully speeding up removal.
- Skipping moisturizer afterward. Dry skin actually holds onto self-tanner longer because dead cells build up unevenly.
- Reapplying over old, unremoved color. Layering fresh tanner over patches that never fully faded creates a muddier, harder-to-fix result.
- Trying multiple harsh methods back to back. Combining lemon juice, toothpaste, and heavy scrubbing in one sitting is more likely to irritate skin than to remove color any faster.
Is It Safe to Remove Self-Tanner This Way?
Yes, for most people, these home methods are considered safe when done gently and followed with moisturizer. Since DHA only stains the outermost layer of skin rather than penetrating deeper tissue, exfoliating it away is simply speeding up a shedding process your skin does naturally anyway.
That said, a few groups should be more cautious. If you have eczema, rosacea, very sensitive skin, or any open cuts or irritation, self-tanning products in general are considered a gentler option than UV tanning, but talking with a doctor before using acidic or abrasive removal methods is a reasonable extra step. Pregnant or breastfeeding individuals wondering about DHA exposure can find dedicated guidance on sunless tanner safety during pregnancy, which addresses absorption and safety questions specific to that stage of life.
It’s also worth knowing that a peer-reviewed safety review found that DHA can occasionally trigger irritant or allergic contact dermatitis in some users. If you notice persistent redness, itching, or a rash rather than simple discoloration, that’s a sign to stop scrubbing and let skin calm down rather than continuing to treat it as a cosmetic streak.
Expert Tips for Faster, Gentler Removal
- Exfoliate in the shower, not before it. Warm water and steam soften skin first, so scrubbing is more effective and less irritating.
- Work in sections. Trying to remove an entire body’s worth of tan in one sitting is what leads to over-scrubbing. Focus on the worst areas first.
- Moisturize daily, even between removal sessions. Hydrated skin sheds more evenly, which prevents the blotchy in-between look.
- A swim can help too. Chlorinated pool water and saltwater both have a mild exfoliating and fading effect on sunless tans.
- Give it 24 to 48 hours if you’re not in a rush. Sometimes the fastest fix is simply letting one more shower cycle do the work rather than forcing it.
Removal Methods Compared
| Method | Best For | Time Needed | Skin Sensitivity |
|---|---|---|---|
| Warm bath + gentle scrub | Full body, sensitive skin | 20–30 minutes | Low irritation risk |
| Baking soda paste | Moderate streaks, uneven patches | 10–15 minutes | Low to moderate |
| Oil-based scrub | Dry skin, full body | 15–20 minutes | Very low |
| Lemon juice | Small stubborn spots | 5–10 minutes | Higher, avoid on sensitive skin |
| Whitening toothpaste | Knuckles, cuticles | 5–10 minutes | Moderate, drying |
| Dish soap + pumice stone | Palms, heels, calluses | 10–15 minutes | Moderate, drying |
| Store-bought remover | Convenience, even results | Varies by product | Depends on formula |
Pros and Cons of Removing Self-Tanner at Home
Pros
- Uses items most people already own
- Inexpensive compared to salon correction services
- Can be done immediately, without waiting for a store to open
- Gentle methods double as skin exfoliation and hydration
Cons
- Full removal usually takes more than one session
- Overly aggressive scrubbing can cause temporary redness
- Acidic methods like lemon juice aren’t suitable for all skin types
- Results can be uneven if you rush the process
How Long Does It Take for Self-Tanner to Fully Fade?
Without any intervention, self-tanner naturally fades within five to ten days as skin cells turn over. Using the exfoliation methods above can shorten that noticeably, often clearing visible streaks within one to three shower sessions, though very concentrated areas like palms or heels may need a bit longer.
If you’re prepping for a specific event and need an even canvas fast, plan on at least one full day of gentle, repeated exfoliation rather than expecting a single scrub to erase everything.
What About Self-Tanner Stains on Clothes or Sheets?
Skin isn’t the only surface that ends up wearing your sunless tan. Fresh product on fabric can transfer before it fully sets, leaving orange-brown marks on sheets, towels, or clothing.
For light stains, a standard laundry pretreatment stain remover applied directly to the mark before washing usually lifts it out. For set-in stains, a mixture of dish soap and warm water dabbed on and left to sit for 15 minutes before washing tends to help, since the same grease-cutting properties that work on skin also break down pigment on cotton and other fabrics. Avoid tossing stained items straight into a hot dryer before treating the stain, since heat can set it permanently.
To prevent this altogether, let self-tanner fully dry, usually about 10 to 15 minutes, before getting dressed or climbing into bed, and consider sleeping on an old set of dark sheets on application nights.
When to See a Dermatologist Instead of DIY-ing It
Home removal methods handle the vast majority of self-tanner mishaps, but there are situations where it makes sense to stop experimenting and get professional input instead.
- Persistent redness, swelling, or a rash that doesn’t calm down within a day or two
- Blistering, open sores, or broken skin in the areas where self-tanner was applied
- A reaction that spreads beyond the original application area
- Discoloration that hasn’t faded at all after two weeks, which could point to something other than typical DHA staining
- Any known history of severe allergic reactions to cosmetic products
A dermatologist can rule out an allergic contact reaction versus simple product residue, and can recommend a prescription-strength option if a stubborn patch genuinely won’t budge with standard exfoliation.
Preventing Uneven Self-Tanner Next Time
Since you’ll likely tan again, a few small habit changes go a long way toward avoiding this whole situation.
- Exfoliate thoroughly 24 hours before applying, not right before, since freshly scrubbed skin can absorb color unevenly
- Moisturize dry areas like elbows, knees, and ankles lightly before applying, so they don’t over-absorb pigment
- Use a tanning mitt for even coverage and to keep palms tan-free
- Wash your hands immediately after application
- Consider a gradual self-tanner if streaking has been a repeat problem, since it builds color more slowly and forgivingly
Frequently Asked Questions
Does vinegar remove self-tanner?
Yes. White vinegar has similar mild acidic exfoliating properties to lemon juice and can help fade color when left on skin for about 10 minutes. It works well on small, targeted patches rather than large areas, since covering a big surface in vinegar and letting it sit can dry skin out fast. It can also be irritating on sensitive skin, so patch test a small area first and rinse thoroughly afterward. If you notice stinging or discomfort within the first minute, rinse it off immediately rather than waiting out the full 10 minutes.
Can I remove self-tanner in one shower?
Sometimes, especially for light or recently applied color, but deeper or older streaks usually need two or three exfoliation sessions spread across a couple of days. Trying to force full removal in one aggressive session tends to irritate skin more than it helps, and irritated, inflamed skin actually holds onto residual color unevenly, which can make a bad tan look worse rather than better in the short term. If you’re on a deadline, plan your first removal session at least a full day before you need to look your best, so you have room for a follow-up pass.
Will removing self-tanner hurt my skin?
Not if you use gentle pressure and moisturize afterward. The color sits on dead surface cells, so lifting it away is essentially accelerated exfoliation, similar to what a body scrub does during a normal shower routine. Skin only gets irritated when scrubbing is too rough, acidic methods like lemon juice or vinegar are left on too long, or the same spot is repeatedly treated within a short window without giving it time to recover. A little redness immediately after scrubbing is normal and should fade within an hour; anything beyond that is a sign to ease off.
What removes self-tanner fastest from hands?
Dish soap combined with a soft nail brush works well for hands, since it cuts through the concentrated color that tends to settle around knuckles, cuticles, and the sides of fingers where extra product often collects during application. Focus the brush on creases rather than flat skin, since that’s where staining is heaviest. Follow with a rich hand cream afterward, since dish soap strips natural oils and can leave hands feeling tight or dry if left untreated.
Why does my self-tanner look patchy even after I remove it?
Patchiness after removal usually means skin underneath wasn’t evenly exfoliated to begin with, so some areas held more product than others from the start. It can also happen if dry patches, like elbows or ankles, weren’t moisturized before your original application, causing them to soak up disproportionately more color. Doing a full-body gentle scrub the day before your next application, rather than spot-treating only the worst areas after the fact, tends to break this cycle and gives you a more even canvas to start from.
Final Thoughts
A streaky or overly dark self-tanner isn’t permanent, and it doesn’t require anything fancy to fix. Warm water, gentle exfoliation, and a little patience handle most situations, while targeted tricks like lemon juice, baking soda, or dish soap take care of stubborn spots on hands and feet. Go easy on your skin, moisturize as you go, and give the process a day or two if you’re not in a rush.
If you’re getting ready for a specific event and want a completely even base to start fresh, begin your removal routine at least a day in advance so you have time for a second pass if needed.