
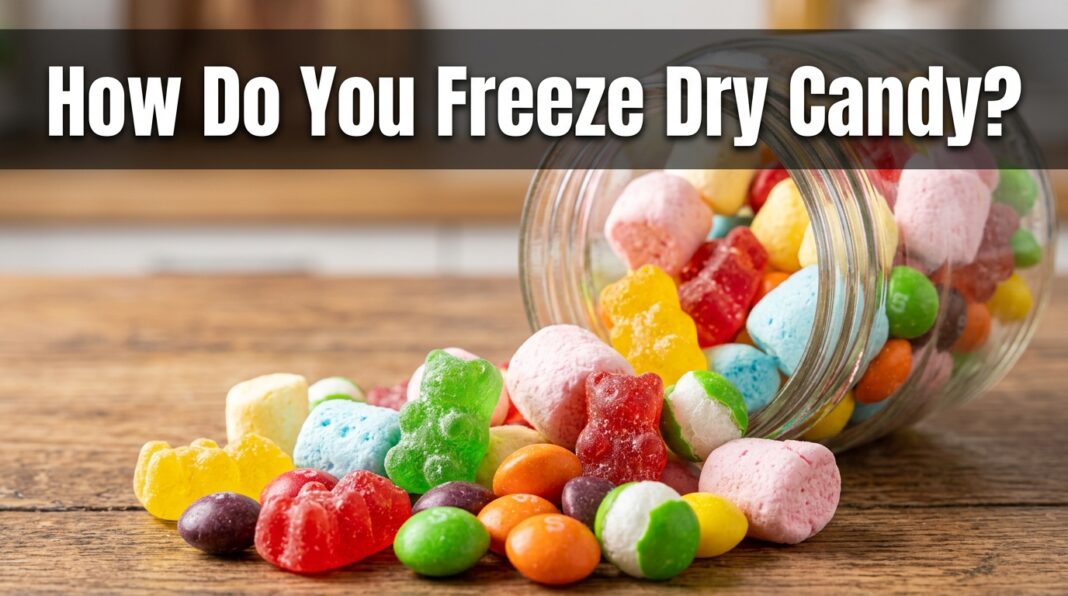
There’s a reason freeze-dried candy has taken over farmers markets, county fairs, and snack aisles in the last few years. A gummy bear that used to be soft and chewy comes out of the process light as a cotton ball, almost hollow, and it practically dissolves the moment it touches your tongue. Skittles turn into little sugar clouds that crackle instead of crunch. It’s a strange transformation to watch the first time, and an even stranger thing to eat.
So how do you freeze dry candy, exactly? The short answer is that you freeze the candy solid, then pull it into a low-pressure environment so the ice inside turns straight into vapor without ever melting into liquid. That’s the whole trick. No heat, no cooking, just cold and vacuum working together to pull water out of the candy while leaving the sugar structure standing.
The long answer involves a bit of food science, some trial and error with different candy types, and a few storage rules that keep your finished treats crisp for months instead of days. This guide walks through all of it in plain language, without the jargon that usually clutters up freeze-drying tutorials.
What Actually Happens When You Freeze Dry Candy
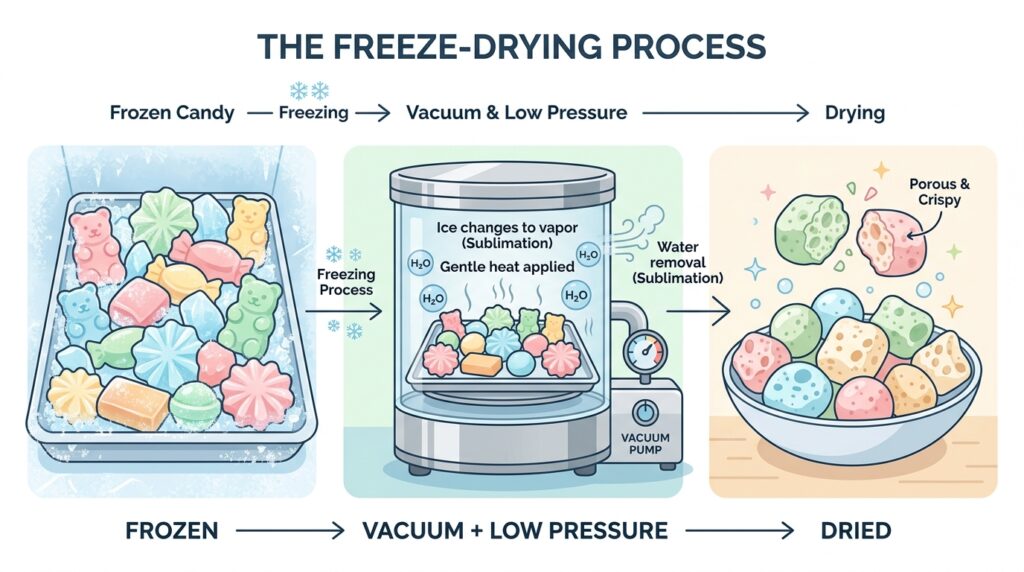
Freeze drying is built around a physics concept called sublimation, which is when a solid turns directly into a gas without passing through a liquid stage in between. Dry ice does this constantly at room temperature, which is why it never leaves a puddle. Water can do it too, but only under very specific conditions of low temperature and low pressure.
Inside a candy, most of that structure-softening moisture is trapped as tiny pockets of water. Freeze the candy hard enough, and that water becomes ice crystals locked inside the sugar matrix. Drop the surrounding pressure low enough, and those ice crystals skip the melting stage entirely and turn straight into water vapor, which gets pulled away by a vacuum pump. What’s left behind is the original shape and flavor of the candy, minus almost all of its moisture. This is the same underlying phase-change principle that governs frost forming and disappearing on a cold morning.
Because the candy never actually melts or cooks, the flavor compounds stay locked in place instead of breaking down from heat. That’s the reason freeze-dried candy tastes more intense than the original piece, not less. Removing water concentrates everything that was already there.
The Two Ways People Actually Freeze Dry Candy
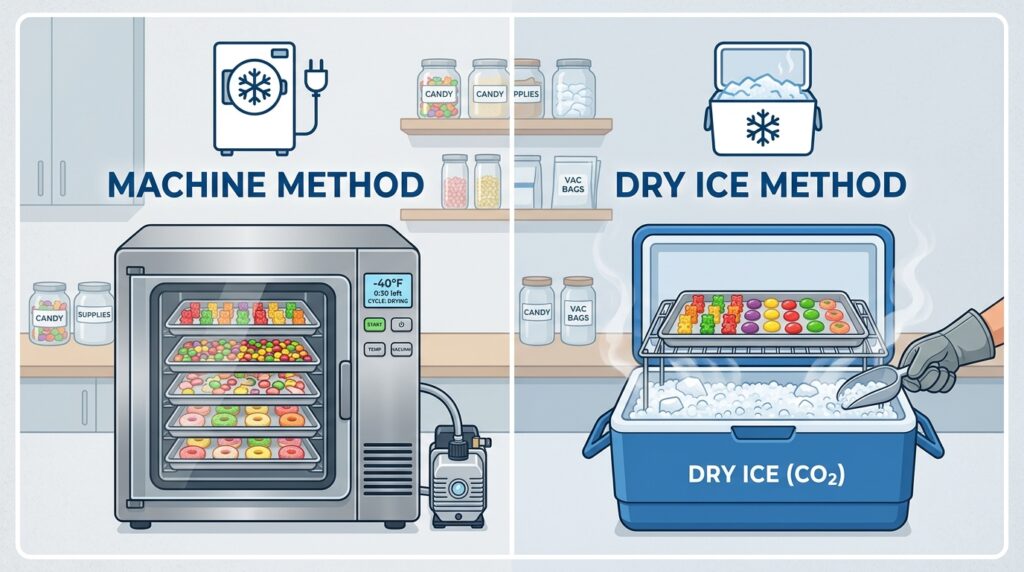
There are really only two practical routes for someone trying this at home, and they land in very different price ranges.
Home freeze-drying machines. These countertop units freeze the food, then pull a deep vacuum and slowly raise the shelf temperature over many hours to draw the moisture out. This is the gold standard for texture and shelf life, and it’s how most of the freeze-dried candy you see for sale online was actually made. According to this freeze-drying walkthrough, a full cycle for candy typically runs anywhere from 24 to 40 hours depending on sugar and moisture content, since sugary foods hold onto their water more stubbornly than vegetables or meat.
The dry ice cooler method. This is the budget workaround for freeze drying candy without a machine, and it’s popular with people who just want to try a small batch before investing in equipment. You place candy on a rack above crushed dry ice inside an insulated cooler, seal it loosely, and let the extreme cold pull moisture out over several hours to overnight. It won’t get candy as fully dry or as shelf-stable as a real vacuum chamber, but it produces a noticeably crunchier, lighter piece of candy that keeps for a few weeks in the freezer.
| Method | Cost to Start | Time Needed | Texture Result | Shelf Life |
|---|---|---|---|---|
| Home freeze dryer | High (equipment cost) | 24–40+ hours | Airy, fully crisp | Months to years, sealed properly |
| Dry ice cooler | Low (dry ice only) | 6–24 hours | Partially crisp, some chew remains | Days to a few weeks, frozen storage |
Neither method is “wrong.” It really comes down to whether you’re testing the idea out or building a habit around it.
Best Candy to Freeze Dry (And What to Skip)
Not every candy responds the same way, and this is where most beginners get tripped up. Sugar and water content decide almost everything about how a candy behaves in a freeze dryer.
Candies that turn out great:
- Gummy bears and fruit chews – they puff up dramatically and turn crunchy on the outside with a slightly chewy core
- Skittles and Starburst – the outer shell cracks open during drying, creating that signature crumbly texture people love
- Marshmallows – they nearly double in size and turn into something closer to a meringue than a marshmallow
- Freeze dried skittles in particular have become one of the most searched candy types because the tartness intensifies so much
- Cotton candy – dries almost instantly and turns delicate, though it needs gentle handling afterward
- Caramels and taffy – work, but need longer cycles since they hold moisture stubbornly
Candies that are difficult or not worth the effort:
- Chocolate bars – the cocoa butter content means they need very specific cold-chamber handling or they turn greasy instead of crisp
- Hard candies like lollipops – contain almost no water to begin with, so there’s little for the process to remove
- Candies with liquid centers – can leak or create uneven drying pockets
A simple rule of thumb: if a candy is soft, chewy, or gummy, it’s a strong freeze-drying candidate. If it’s already hard and glassy, freeze drying won’t change much about it.
How Do You Freeze Dry Candy at Home: Step-by-Step
This section covers the process using a home freeze-drying machine, since that’s the method that produces consistent, storable results.
Step 1: Prep the candy
Remove every wrapper completely. Cut larger candies like caramels or taffy into smaller, evenly sized pieces so they dry at the same rate. Leave gummies and small candies whole.
Step 2: Arrange on trays
Spread the candy in a single layer with space between each piece. Crowding candy on a tray blocks airflow and leads to uneven drying, which is one of the most common beginner mistakes.
Step 3: Choose a tray technique if needed
Sticky candies like marshmallows or cotton candy tend to fuse to the tray or clump together. A light layer of parchment paper, or gently warming the tray beforehand, helps prevent this. Reference the tray preparation tips for candy that tends to stick or spread during the freezing stage.
Step 4: Run the freeze-drying cycle
Load the trays and start the cycle. The machine will freeze the candy solid, then gradually pull a vacuum and apply mild heat over many hours to draw moisture out through sublimation. Sugary foods generally need a longer cycle than fruits or vegetables because sugar holds water more tightly.
Step 5: Test for dryness before storing
This step matters more than people expect. Take the largest piece from the batch and snap it in half. It should feel light, dry, and slightly crumbly all the way through, with no cold or tacky spot in the center. If there’s any give or coolness left, run another drying cycle rather than packaging it early, since leftover moisture is the main cause of spoiled batches later.
Step 6: Package immediately
Once a batch is confirmed dry, package it right away. Freeze-dried candy is highly hygroscopic, meaning it pulls moisture straight out of the air, so leaving it uncovered on the counter for even twenty minutes can undo hours of drying.
Storing Freeze-Dried Candy So It Actually Lasts
Freeze dried candy shelf life depends almost entirely on how well it’s sealed after drying, not on the drying process itself. Properly dried candy stored the right way can stay fresh and crisp for a long time; the same candy left in a loose bag on the counter will turn soft again within hours.
A few storage guidelines worth following:
- Vacuum-sealed mason jars are the easiest option for candy you plan to eat within a few months
- Mylar bags with an oxygen absorber work well for longer storage, since the foil layer blocks light and moisture far better than plastic alone, a point covered in this oxygen absorber usage guide
- Keep containers away from direct sunlight and heat, since both accelerate moisture reabsorption even through a sealed container
- Label everything with the drying date, since freeze-dried candy doesn’t show obvious visual spoilage the way fresh food does
One quiet detail beginners miss: sugar-heavy freeze-dried foods are more sensitive to humidity swings than plain fruits or vegetables. Opening and closing a jar repeatedly to grab a snack introduces small amounts of moisture each time, which is why many people portion candy into smaller sealed bags right after drying instead of keeping one large open container.
Expert Tips for Better Results
A few small adjustments separate an average batch from a great one.
- Don’t rush the drying cycle. Sugary, chewy candies almost always need longer than the default settings suggest. Pulling a batch early is the single most common reason people end up with chewy centers instead of crisp ones.
- Sort candy by type before loading trays. Mixing a dense caramel with a light marshmallow on the same tray means one will finish drying long before the other.
- Test more than one piece. Moisture can hide unevenly across a tray, so checking just one candy isn’t always reliable.
- Let trays cool slightly before handling. Freshly finished candy is extremely brittle and can crumble if handled while still cold from the chamber.
- Store in small batches. Splitting a large batch into several smaller sealed jars means opening one jar for snacking doesn’t expose the entire supply to air.
Pros and Cons of Freeze Drying Candy
| Pros | Cons |
|---|---|
| Dramatically longer shelf life when sealed properly | Home freeze-drying machines require a real upfront investment |
| Intensifies flavor without added sugar or preservatives | Full cycles can take well over a day per batch |
| Creates a genuinely unique, crunchy texture | Not every candy type freeze dries successfully |
| Lightweight and easy to transport or gift | Requires careful, airtight storage to avoid moisture reabsorption |
| Works well as a homemade freeze dried candy gift or party favor | Learning curve for tray loading and drying times |
Common Mistakes to Avoid
- Overcrowding trays, which traps moisture between pieces and leads to a batch that dries unevenly
- Skipping the dryness test and packaging candy that still has a soft or cool center
- Using regular zip-top bags instead of proper mylar or vacuum-sealed containers, since ordinary plastic still lets in slow moisture over weeks
- Freeze drying candy with liquid or oily centers without adjusting expectations, since these rarely dry evenly
- Leaving finished candy exposed to air while cooling, which can undo a large portion of the drying work in minutes
Frequently Asked Questions
How long does it take to freeze dry candy?
It depends heavily on the candy type and the method used. A home freeze-drying machine typically needs 24 to 40 hours for sugary, chewy candies, while the dry ice cooler method can produce a partially dried result in as little as 6 to 12 hours, though it won’t be as fully dry as machine-processed candy.
Can you freeze dry candy without a machine?
Yes, using the dry ice cooler method, though the results are less consistent and the candy won’t last nearly as long in storage. It’s a reasonable way to test whether you like the texture before investing in equipment.
Why does freeze-dried candy taste stronger than regular candy?
Removing the water concentrates the sugar and flavor compounds that were already in the candy. Nothing new is added; the process simply pulls out the moisture that was diluting the flavor.
Does freeze drying candy make it healthier?
Not meaningfully. The sugar and calorie content stay essentially the same since freeze drying only removes water, not sugar. The main differences are texture, shelf life, and flavor intensity, not nutrition.
How do you know if freeze-dried candy has gone bad?
If it feels chewy, sticky, or soft again after being properly dried and sealed, moisture has gotten back in and it’s past its best texture. It’s rarely dangerous to eat in that state, but the quality has clearly declined, so checking texture regularly is the easiest way to judge freshness.
Bringing It All Together
Freeze drying candy isn’t complicated once you understand the core idea: freeze it solid, then pull the moisture out through vacuum instead of heat. The equipment and timing details are where beginners spend most of their trial and error, but the underlying science stays the same whether you’re working with a full-size home machine or a cooler packed with dry ice.
If you’re just getting started, pick one or two candies known for freeze-drying well, like gummy bears or Skittles, run a small test batch, and pay close attention to the dryness test before sealing anything away. Once that first batch turns out right, scaling up to bigger trays and longer-term storage becomes a lot more predictable.
Give it a try with whatever candy is already sitting in your pantry, and see how differently it turns out once the moisture is gone.