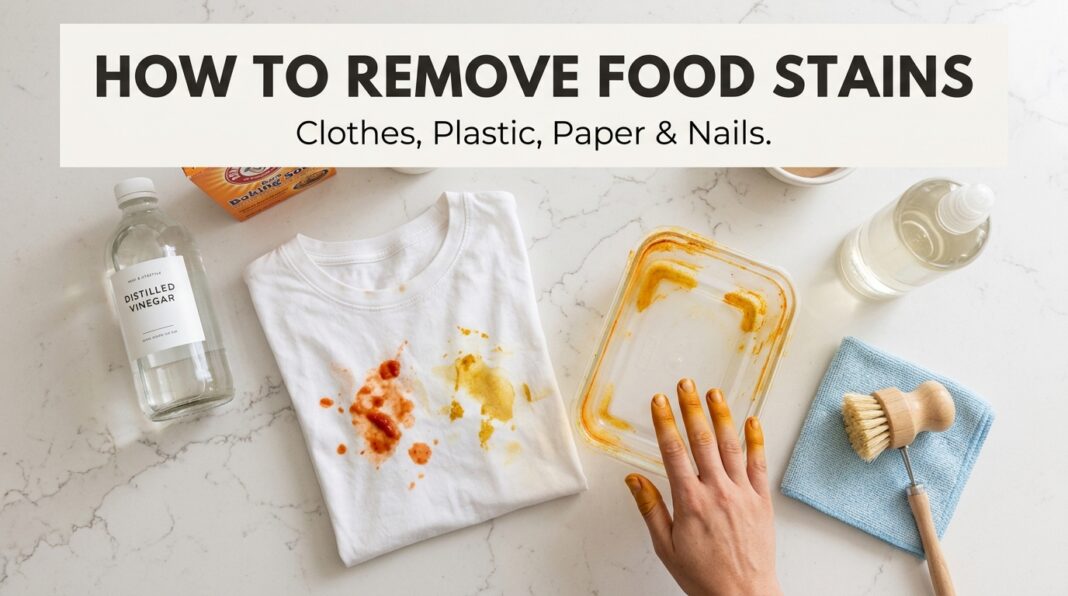
Dinner rarely stays on the plate where it belongs. A drop of sauce lands on a white shirt, turmeric turns your fingertips yellow, or a lunch container comes out of the microwave looking permanently orange. Learning how to remove food stains the right way saves clothes, containers, and a little bit of your sanity, and most of the time the fix is already sitting in your kitchen cabinet.
The trick isn’t finding one miracle product. Different foods leave different kinds of marks, oily, pigmented, protein-based, or a mix of all three, and each one responds better to a slightly different approach. Once you understand what’s actually happening at a fiber or surface level, the right fix becomes a lot more obvious.
Most people reach for whatever’s closest, a splash of tap water, a paper towel, maybe a dab of laundry detergent straight from the bottle, and hope for the best. Sometimes that works. More often, it just spreads the mess around or sets it deeper, especially if the item ends up in a hot dryer before anyone checks whether the stain actually lifted. A little bit of know-how upfront saves a lot of frustration later, and none of the methods below require anything you’d need to buy specially.
This walkthrough covers clothing, paper, plastic storage containers, and even stained fingernails, since food doesn’t limit itself to fabric. Each section breaks down exactly what to reach for and how long to let it work, so you can skip the guesswork next time something spills.
Why Food Stains Are So Stubborn to Begin With
Not every stain is created equal, which is part of why a single trick rarely works on everything. Tomato sauce, turmeric, and berries leave behind pigment that clings to fibers. Butter, oil, and salad dressing leave a greasy residue that repels plain water. Milk, egg, and cheese leave protein that can actually cook into the fabric if you use hot water too soon.
That last part trips a lot of people up. Heat sets protein-based stains almost instantly, so a quick trip through a hot dryer can turn a fixable spot into a permanent one. Cold water first, heat only after the stain is gone, is a rule worth remembering across almost every fabric and surface listed below.
Timing matters just as much as technique. A fresh stain that’s blotted within a few minutes is dramatically easier to lift than one that’s had a chance to dry and bond with whatever it landed on.
It also helps to know roughly which category a stain falls into before you start treating it, since grabbing the wrong product can occasionally make things worse. A quick mental sort looks something like this:
- Greasy stains: butter, oil, salad dressing, fried food. These need something that cuts fat, like dish soap, rather than plain water alone.
- Pigment stains: tomato sauce, turmeric, berries, coffee, wine. These respond well to acidic solutions like vinegar or lemon juice, which help break down the color molecules.
- Protein stains: egg, milk, cheese, cream-based sauces. These need cold water first and enzyme-based cleaners, since heat can cook the protein into the material.
- Combination stains: curry, pizza sauce, gravy. These usually need a two-step approach, treating the grease first and the pigment second.
Once you know which bucket a stain fits into, picking the right first move gets a lot easier, and you’ll waste less time repeating a method that was never going to work on that particular mark.
How to Remove Food Stains From Clothes
For most everyday spills, the same basic three-step process works whether it’s ketchup, gravy, or a smear of chocolate. First, scrape off any excess food with a spoon or the dull edge of a knife rather than rubbing it, which only pushes the stain deeper into the weave.
Next, run the back of the fabric under cold water so the stain flushes out and away from the fibers instead of further in. Then work in a small amount of liquid dish soap, since it’s built to break down grease and food residue, and let it sit for about ten minutes before rinsing again.
One widely used method for getting stains out of clothes leans on this same dish soap and cold water combination for everything from butter to berry juice, adjusting only the soak time based on how stubborn the mark is. A separate roundup of home remedies for food stains adds that a vinegar and cold water soak works especially well after the dish soap step for anything with natural dye, like berries, turmeric, or tomato sauce.
Only move the item to the dryer once you’ve confirmed the stain is completely gone. Checking in good light before laundering saves you from accidentally baking a faint mark into the fabric permanently.
Some of the most common culprits deserve a slightly different tweak to that basic routine. Chocolate, for example, is both greasy and pigmented, so it usually needs a dish soap treatment followed by a short vinegar soak rather than one or the other alone. Gravy and cream sauces behave more like protein stains, so cold water first is especially important there to avoid setting them. Fruit juice and popsicle stains lift fastest with a straight cold water rinse followed by a short soak in diluted vinegar, since there’s no grease involved to fight through first.
A stained garment left balled up in a hamper for a few days is noticeably harder to treat than one addressed the same evening. If you can’t get to laundry right away, at least give the stain a quick cold rinse and a dab of dish soap before setting it aside, since that alone buys you a lot more time before the mark starts to set for good.
How to Remove Food Stains From Cotton Clothes
Cotton is forgiving compared to delicate fabrics, which is part of why it holds up so well to repeated treatment. Because cotton fibers are absorbent, a stain can sink in fast, but that same absorbency also means soap and vinegar solutions penetrate deeply and work quickly.
For a stubborn cotton stain, a short soak in a mix of one part white vinegar to two parts cold water, followed by a normal wash, tends to do the job. One method built specifically around food stains on cotton and other everyday fabrics recommends this same vinegar dilution, letting it sit for a few minutes before blotting rather than scrubbing, since scrubbing can fray cotton fibers over time.
If a cotton stain has already been through the dryer once, don’t give up right away. Repeating the dish soap and vinegar cycle two or three times, always checking before the next dry cycle, often still gets old stains out.
Cotton blends, like a cotton-polyester t-shirt, generally respond just as well to these steps, though the synthetic fibers mixed in can sometimes hold onto oily stains a bit longer than pure cotton would. If a blend still shows a faint grease shadow after washing, a second round of dish soap applied directly to the dry fabric, worked in with an old toothbrush, usually finishes the job.
How to Remove Food Stains From White Clothes
White fabric shows every mark, which makes stain removal feel a little more urgent, but it also gives you more options since bleach-based products are usually safe to use. For how to remove food stains from white clothes, start the same way as any other garment: scrape, rinse from the back, then treat with dish soap.
If color remains after that first pass, a solution of three parts white vinegar to one part water, left to soak for fifteen to twenty minutes, handles most pigmented residue like tomato sauce or coffee. One breakdown of stain removal steps for white garments also points to toothpaste as an unexpected fix, since a small amount rubbed into the stain and left for a couple of hours can lift certain food marks before a normal wash.
For anything that survives both of those attempts, an enzyme-based detergent or an oxygen bleach soak is the next step up. A cleaning resource focused on treating a wide range of fabric stains notes that enzymatic detergents are particularly effective on protein-based stains like egg, milk, or cheese, since the enzymes break down the proteins rather than just lifting surface color.
Chlorine bleach is an option for sturdy white cottons as a last resort, but it should never be combined with vinegar or ammonia, since the combination produces dangerous fumes.
White fabric also tends to show yellowing over time from repeated washing, which can make an old stain look worse than it actually is once it’s mixed in with general discoloration. Soaking the whole garment in an oxygen bleach solution overnight, rather than spot-treating just the stain, often brightens the entire piece at once and makes any remaining mark far less noticeable. For white cotton napkins, tablecloths, or kitchen towels that see stains constantly, keeping a dedicated bucket for oxygen bleach soaking near the laundry area makes the whole process faster since you’re not mixing a fresh batch every time.
How to Remove Food Stains From Colored Clothes
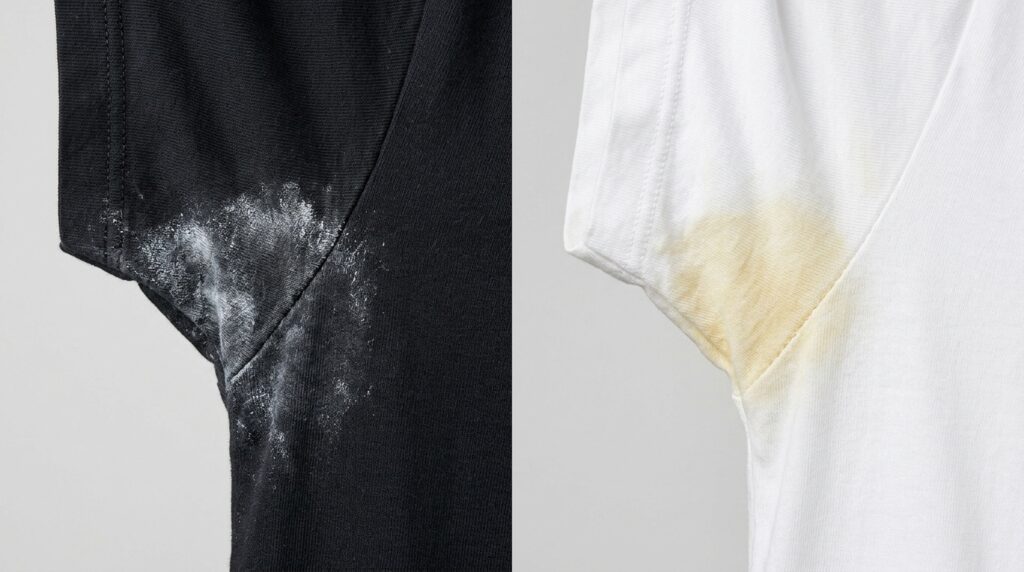
Colored and printed fabrics need a gentler hand, mostly because the same bleach that saves a white shirt can strip color right out of a dyed one. For how to remove food stains from colored clothes, the goal is lifting the food residue without touching the fabric’s own dye.
Dish soap and cold water are still the safest starting point here too. If more power is needed, oxygen-based bleach is the better choice over chlorine bleach, since it’s formulated to be color-safe. A method built specifically around treating food dye and pigment stains on fabric recommends blotting excess residue first, then flushing the stain from the back with cold water before applying an oxygen-based stain treatment and letting it soak for several hours.
Always spot test any product on an inside seam first. A fabric that looks solid in color can still bleed or fade slightly with strong treatments, and testing an inconspicuous area first prevents an unpleasant surprise on the front of the garment.
Printed or patterned fabrics deserve extra caution, since the print itself is sometimes applied differently than the base dye of the fabric. Vinegar soaks are generally safe on printed cotton, but anything stronger, including oxygen bleach left on too long, can occasionally soften or crack a printed design. When in doubt, treat a small area near the stain first and wait to see how the print reacts before committing to the whole garment.
Dark colors, particularly black and navy, can sometimes develop a faint lighter ring around a treated stain if too much soap or vinegar is used without a thorough rinse. Rinsing more than feels necessary, until the water runs completely clear, is the easiest way to avoid that halo effect.
A quick comparison of approach by fabric type:
| Fabric Type | Safe Stain Fighters | Avoid |
|---|---|---|
| White cotton | Chlorine bleach, vinegar, enzyme detergent | Nothing major to avoid |
| Colored cotton | Oxygen bleach, dish soap, vinegar | Chlorine bleach |
| Delicate/silk | Cold water, mild soap, dry cleaner | Scrubbing, hot water |
How to Remove Food Stains From Paper
Paper reacts very differently from fabric since it can’t be soaked or scrubbed without falling apart. For how to remove food stains from paper, the method depends heavily on whether the mark is a greasy stain or a liquid, pigmented one like coffee or juice.
For grease and oil, an absorbent powder like cornstarch, talcum powder, or baking soda spread over the mark and left for several hours will draw much of the oil out before it’s brushed away. A method for treating an oil stain on paper also suggests placing a piece of clean paper over the stain and running a warm iron over it, which pulls the remaining oil out through heat rather than moisture, since water would only warp or tear the page.
Liquid stains like coffee or juice are trickier since any attempt to wet the paper risks smearing ink or warping the fibers. In these cases, a barely damp cloth used to gently blot, rather than rub, the stain is usually the safest option, accepting that some faint discoloration may remain on important documents.
For anything you truly can’t risk damaging further, like an old photo or a signed document, it’s worth leaving the deeper stain-lifting to a paper conservation professional rather than experimenting at home.
Book pages present their own challenge since you’re working around a spine and often thinner paper than a standalone document. Sliding a piece of wax paper or parchment behind the stained page before applying any powder or blotting keeps the treatment from bleeding through to the page underneath. For a receipt or thermal paper specifically, skip the iron entirely, since heat can darken or blank out thermal print completely, and stick to a light dusting of cornstarch followed by a gentle brush-off instead.
Fresh grease stains respond far better to any of these methods than ones that have already dried and darkened. If you catch a spill on paper right away, even blotting immediately with a dry napkin before reaching for cornstarch or an iron can cut the final size of the stain by more than half.
How to Remove Food Stains From Plastic Containers
Plastic has a slightly porous surface, which is exactly why tomato sauce, curry, and turmeric leave behind that stubborn orange or yellow tint even after a normal wash. For how to remove food stains from plastic containers, a paste of baking soda and a few drops of dish soap, left on the stain for fifteen minutes before scrubbing, handles the majority of everyday marks.
For deeper, set-in staining, a full soak works better than a quick scrub. One breakdown of removing stains from plastic food storage recommends filling the container with a one-to-one mix of white vinegar and water, letting it sit for thirty to sixty minutes, then finishing with the baking soda scrub if any color remains.
Sunlight is an underrated tool here too. Coating the stained area with a bit of lemon juice, then leaving the container in direct sunlight for a few hours, uses natural UV exposure to fade pigment that soap alone can’t fully lift.
Prevention goes a long way with plastic specifically. Letting food cool before storing it, and lightly coating the container with a thin layer of oil before adding something like tomato sauce, both reduce how deeply pigment soaks into the plastic in the first place.
Lids are usually the worst offenders since their ridged, textured underside traps sauce and pigment in spots a sponge can’t easily reach. Soaking lids separately, fully submerged, tends to work better than trying to scrub them upright in a sink, since the ridges stay saturated in the cleaning solution the whole time rather than drying out between scrubs.
Older, well-used containers that have picked up a permanent light tint even after multiple treatments aren’t necessarily ruined. A faint tint from years of use is mostly cosmetic and doesn’t affect food safety as long as the plastic itself isn’t cracked, warped, or cloudy in a way that traps odor. Many people simply designate older, permanently tinted containers for freezer storage or non-pigmented leftovers going forward.
How to Remove Food Stains From Tupperware
Branded containers like Tupperware are usually made from a slightly higher grade of plastic, but they still stain the same way, through porous surfaces absorbing pigment from acidic, oily foods. The good news is that this same durability means you can be a bit more aggressive with scrubbing than you might with a flimsier container.
Beyond the baking soda and vinegar methods already mentioned, a denture tablet soak is a lesser-known trick worth trying. One resource focused specifically on removing stains and odors from Tupperware points to a combination of vinegar, baking soda, and dish soap as the strongest at-home option for deep-seated stains, recommending an overnight soak for containers that have been stained for a while.
If a lid or container has picked up a lingering smell along with the stain, leaving it open with a sprinkle of dry baking soda inside for twenty four hours before washing normally usually clears both problems at once.
It’s worth noting that dishwashers alone rarely solve a set-in stain, even on a high heat cycle. The water temperature and detergent used in most dishwashers are built for grease and food residue, not for lifting pigment that’s already worked its way into the plastic. Treating the stain by hand first, then running the container through a normal dishwasher cycle afterward for a final clean and sanitize, tends to give the best overall result.
How to Remove Food Stains From Nails
Cooking with pigmented spices, especially turmeric, almost always leaves a yellow tint under and around the nails that regular hand soap barely touches. For how to remove food stains from nails, acting quickly makes a real difference, since fresh stains lift far more easily than ones that have had time to set overnight.
Soaking your fingertips in fresh lemon juice for ten to fifteen minutes is one of the simplest starting points, since the natural acidity helps break down the pigment. A collection of methods for treating turmeric-stained nails also suggests following the lemon soak with a gentle baking soda paste scrub, using a soft nail brush to work it into the stain without scratching the nail surface.
If the stain is still visible after that combination, a cotton ball dipped in rubbing alcohol and pressed against the nail for a minute or two can lift the last of the discoloration. Just avoid using this method if there are any small cuts or hangnails nearby, since alcohol will sting broken skin.
Wearing thin kitchen gloves while handling turmeric, beets, or berries is the easiest long-term fix, saving you the whole cleanup process the next time you cook.
Turmeric isn’t the only kitchen ingredient that leaves nails looking worse for wear. Beet juice and berry pigments respond to the same lemon and baking soda combination, though they tend to lift a bit faster than turmeric since the pigment doesn’t bind quite as aggressively. Curry paste and hot sauce can leave both a stain and a lingering burning sensation if nails have any small cracks, so rinsing thoroughly with plain water before starting any treatment is worth doing first in those cases.
If stains keep showing up week after week from regular cooking, a thin coat of clear nail polish or cuticle oil applied before you start cooking can act as a barrier, making cleanup afterward noticeably easier since the pigment has less to grip onto.
Expert Tips for Getting Food Stains Out Every Time
A few habits separate people who get stains out reliably from people who end up tossing the stained item:
- Treat it cold, not hot. Hot water can set protein and starch-based stains almost instantly, so always start with cold water regardless of what caused the mark.
- Blot, don’t rub. Rubbing pushes the stain further into fibers or plastic pores instead of lifting it out.
- Work from the back of the fabric. Flushing water through the reverse side pushes the stain out and away rather than deeper in.
- Check before you dry. A dryer’s heat can permanently bake in a stain that a second wash would have removed.
- Match the treatment to the stain type. Greasy stains respond to dish soap and absorbent powders, pigment stains respond to vinegar and sunlight, protein stains respond to enzymes and cold water.
A general resource on common food and drink stains reinforces this same idea, treating each stain type, from berries to soy sauce to spaghetti sauce, with a slightly different combination of vinegar, dish soap, and cold water rather than a single universal fix.
Pros and Cons of Common Stain Removal Methods
Dish soap and cold water
- Pros: gentle, safe on almost every fabric and surface, cuts grease well
- Cons: not strong enough alone for deep, set-in pigment stains
White vinegar soak
- Pros: effective on pigment and natural dye, inexpensive, safe for colors
- Cons: strong smell during use, never mix with bleach or hydrogen peroxide
Baking soda paste
- Pros: mildly abrasive without scratching most surfaces, absorbs grease and odor
- Cons: works slowly, often needs a follow-up soak for older stains
Bleach (chlorine or oxygen)
- Pros: strongest option for deep or old stains
- Cons: chlorine bleach can damage colored fabric; always ventilate the area when using either type
Preventing Food Stains Before They Happen
Treating a stain well is useful, but avoiding one in the first place is even better. A few small habits cut down on how often you’ll need any of the methods above.
Keeping a damp cloth or a stack of napkins within reach while cooking means a spill gets addressed in seconds instead of sitting for an hour. Pigmented ingredients like turmeric, beet juice, or berries are worth handling with a bit of extra care, whether that means an apron, gloves, or simply working over a cutting board instead of directly over a countertop or clothing.
For containers, letting hot food cool for ten to fifteen minutes before transferring it into plastic reduces staining significantly, since heat opens up the plastic’s pores and lets pigment seep in faster. Glass containers are a reasonable swap for anything you know stains badly, like tomato-based sauces or curry, since glass doesn’t absorb pigment the way plastic does.
For paper, keeping food and drinks a safe distance from important documents, or working over a placemat instead of directly on top of paperwork, avoids a whole category of avoidable stains. None of these habits take much extra effort, but together they mean a lot less time spent scrubbing later.
Frequently Asked Questions
Does hot water help remove food stains?
Not usually, and it can actually make things worse. Hot water sets protein-based stains like egg, milk, or cheese almost permanently, so cold water should always be the first step regardless of what caused the stain.
Can I use the same method for every type of food stain?
Not quite. Greasy stains like butter respond best to dish soap and absorbent powders, while pigmented stains like berries or turmeric respond better to vinegar or lemon juice, since those help break down the color molecules specifically.
Is it safe to use bleach on all fabrics?
No. Chlorine bleach is generally safe on sturdy white cottons but can fade or damage colored and delicate fabrics. Oxygen-based bleach is the safer choice for colored clothing since it’s formulated not to strip dye.
How long can a food stain sit before it becomes permanent?
There’s no exact cutoff, but stains that go through a hot dryer cycle before being fully treated are far more likely to set permanently. Treating a stain within the first few hours, and definitely before drying, gives you the best odds of full removal.
Why do turmeric and tomato sauce stain plastic containers so badly?
Plastic has a slightly porous surface, and the natural pigments in turmeric and tomato sauce are strong enough to seep into those tiny pores, especially when the food is still hot when it’s stored. Letting food cool before storing it helps prevent this in the first place.
Putting It All Together
Food stains feel dramatic in the moment, but almost all of them come down to the same short list of tools: cold water, dish soap, white vinegar, and a little patience. Match the treatment to the type of stain rather than reaching for the same fix every time, and skip the dryer until you’ve confirmed the mark is actually gone.
Next time something lands where it shouldn’t, whether it’s on a shirt, a container, or your own hands, try treating it right away with the method that fits the stain instead of scrubbing blindly. A little bit of the right approach, applied quickly, usually saves the item entirely.
Keep a small stain-fighting kit within reach at home, some dish soap, a bottle of white vinegar, a box of baking soda, and a few clean cloths, and most spills stop being a source of stress altogether. Over time, matching the right fix to the right mess becomes second nature, and that stack of stained shirts or cloudy containers you’ve been meaning to deal with finally starts shrinking instead of growing.